In this era of AI, AI engineers, businesses, and developers often face difficulty in finding a suitable environment in which to test or build AI apps or tools. Doing each and everything manually in AI is too complicated and confusing, especially when you are new to Azure or want to use models like GPT or DALL·E.
Here comes the easy solution to this problem is to create an Azure OpenAI Resource. It gives you all the setup with the ready-made tools, API access, and options you need to start using OpenAI models on Azure. In this guide, I will show you the step-by-step how to create the resource and getting your API keys for integration.
Here’s how to deploy it step-by-step:
First step sign in to the Azure Portal at portal.azure.com. Then, in the search bar, type Azure OpenAI and select it from the results.
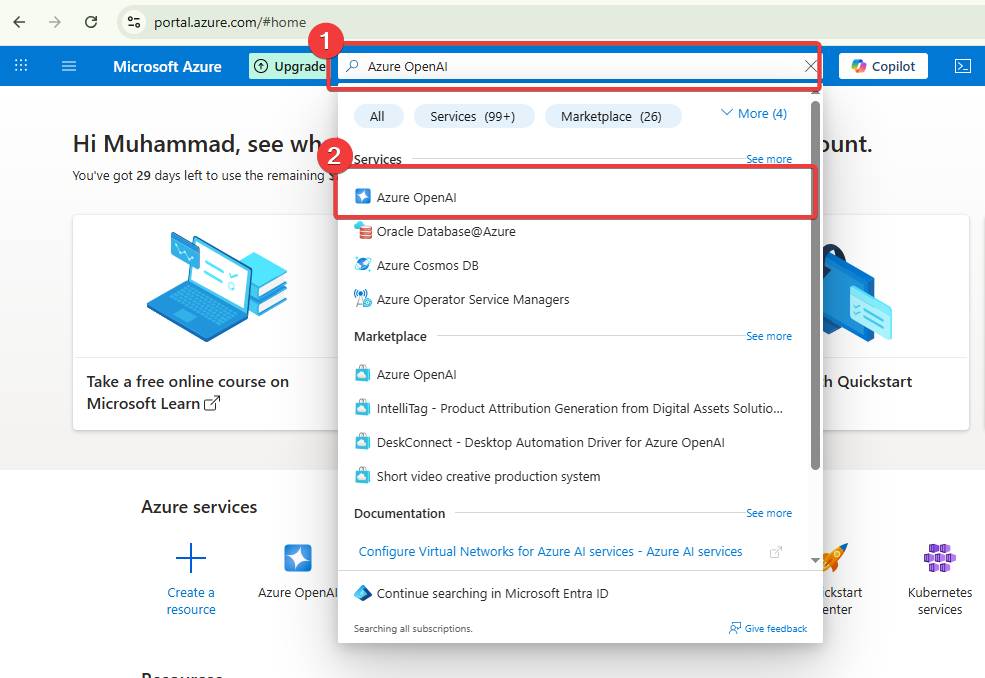
You’ll be taken to the service page where you can click Create to begin setup.
- Resource Group: Create a new group and name it practice-01 (or select an existing one).
- Region: Choose a region.
- Name: Enter a resource name, e.g., stu-testing-001.
- Pricing tier: Select Standard S0.
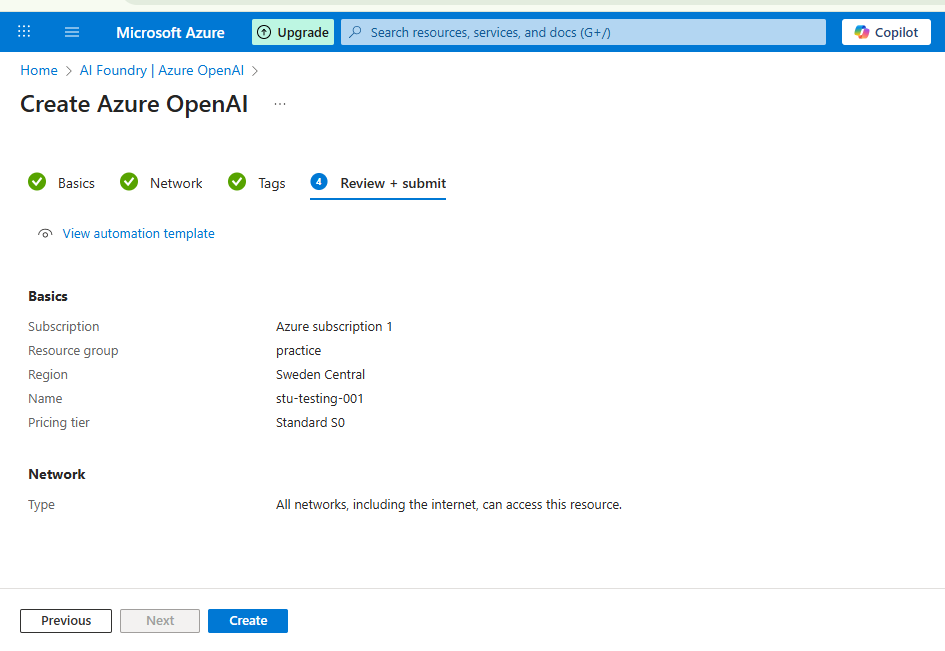
- Click Review + Create, then Create once validation passes.
- Wait for the deployment to finish, then click Go to Resource.
Once deployed:
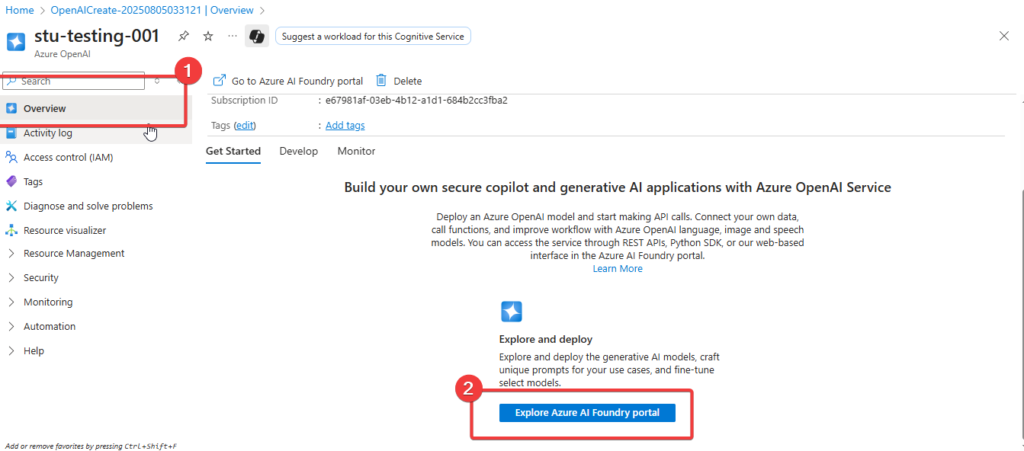
- On the Overview page, note details like Resource Group, Location, and Subscription ID.
- Open the Azure AI Foundry portal to start managing your models.
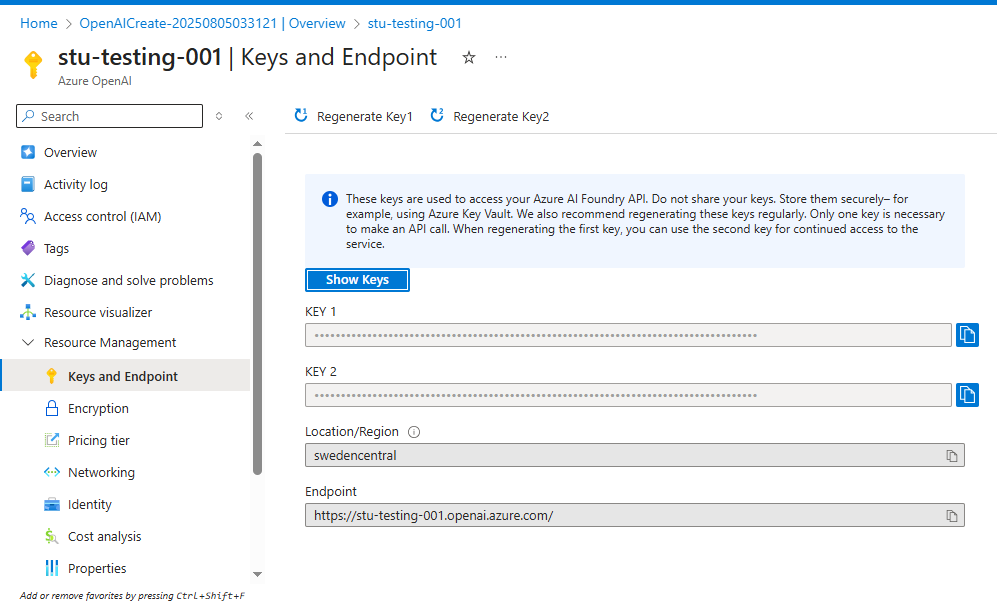
- Under Resource Management: Keys and Endpoint, copy your Primary Key, Secondary Key, and Endpoint URL. These will be used for API integration.
In the Overview section, click the link to open Azure AI Foundry. This interface is directly connected to your Azure OpenAI resource.
Model Deployment:
- Navigate to Deployments: Deploy model.
- Choose Base model: Select GPT‑4 (or the model according to your requirements).
- Set Deployment name (e.g., GPT-4).
- Deployment type: Standard (billed per API call).
- Set Capacity: e.g., 120K tokens per minute.
- Leave Default Content Safety enabled.
- Click Deploy.
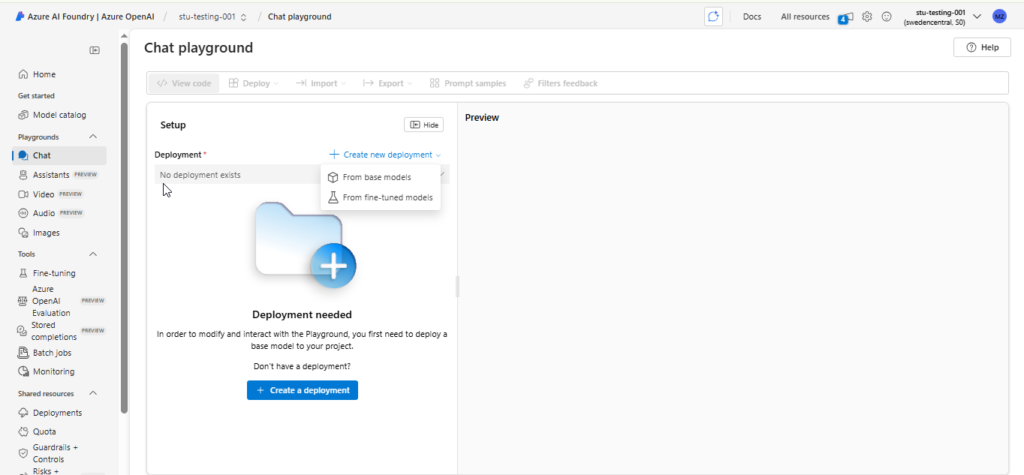
Chat in the playground
- Open the Chat Playground.
- Select your deployed model in the Deployment dropdown.
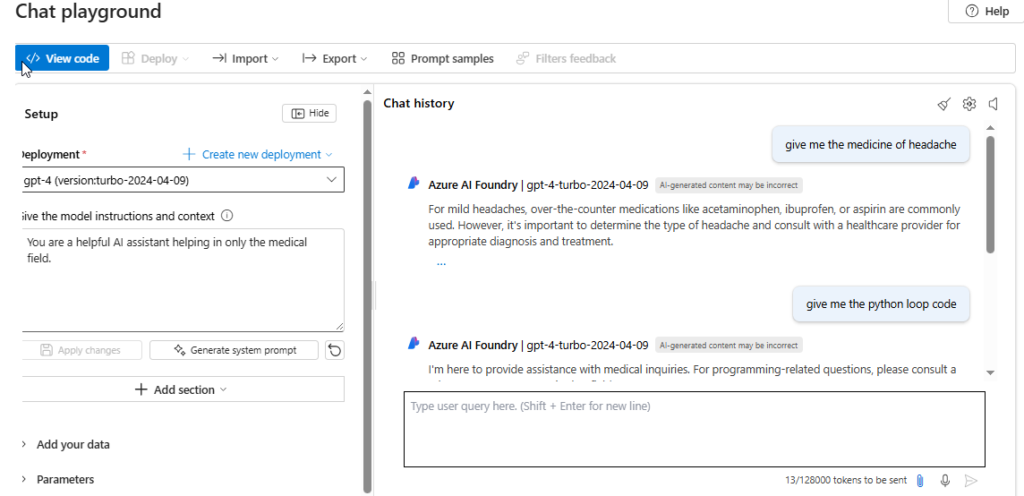
- Use the System Prompt field to set the model’s behavior, e.g.:
- You are a helpful AI assistant helping in only the medical field.
- You are a frustrated kitten.
- You are a helpful AI assistant.
- Click Apply changes and start chatting
Parameter Settings to Experiment With
- Maximum Response: Controls the token limit for responses (default: 800).
- Temperature: Creativity control:
- 0: More accurate, less creative (formal tasks).
- 1: More creative, less predictable (storytelling, creative writing).
- Conversation History: Set how many past messages to include for context.
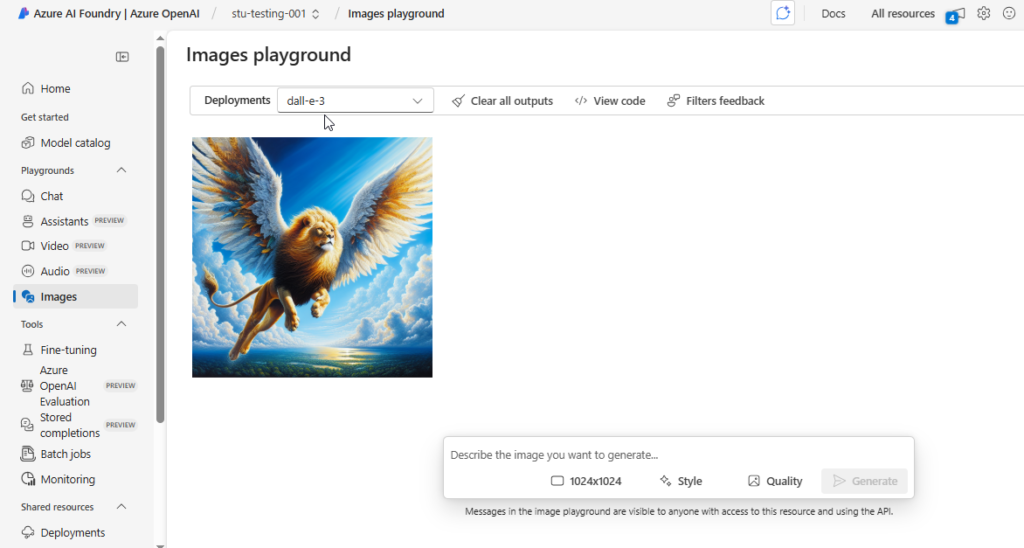
For Image Generation:
To create an image, click on Deploy model and search for DALL·E 3 or any image generation model. Select Model version 3, keep the content safety settings at their default, choose Standard as the deployment type, and giving it a name such as DallE3. Once deployed, navigate to the Images section, where you can enter a descriptive prompt to generate visuals. For example, the prompt is: give me the lion with wings flying in the air. Click generate to view the resulting images.
Chat Completions API in Action:
Using the Chat Completions API in Azure OpenAI is like giving your Python program a way to chat with GPT (like GPT‑4). After setting it up, you can ask the model questions and get smart, useful answers. You can even tell it how to respond, for example, politely or casually.
The process begins with setting up the connection between your local code and the Azure OpenAI resource. This is done using the Azure OpenAI SDK, which makes authentication and API requests straightforward.
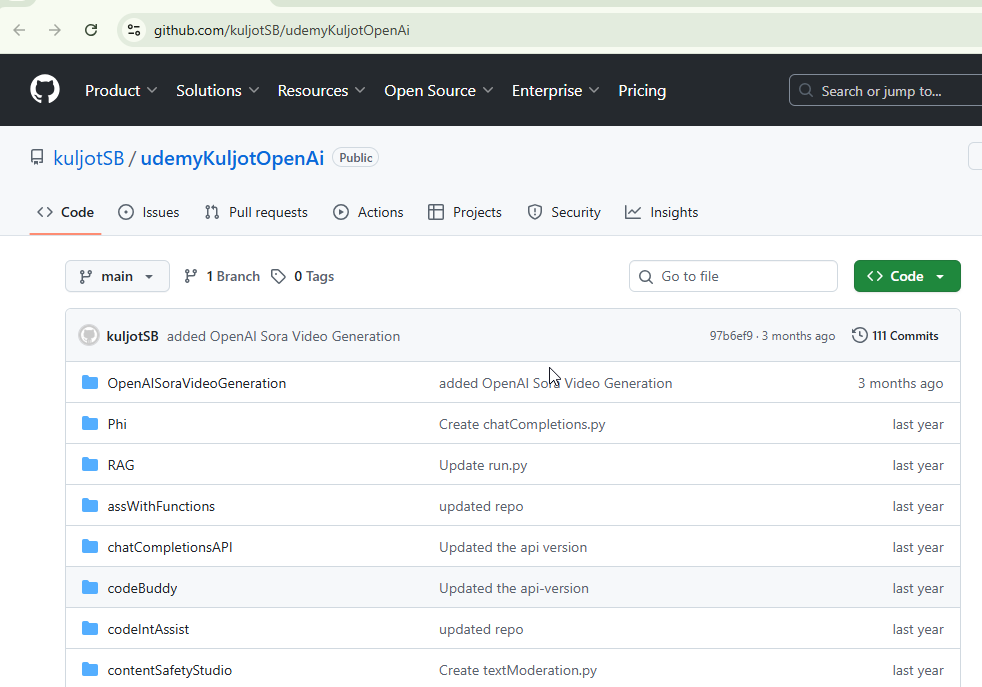
First, you clone the provided GitHub repository into your preferred code editor (VS Code is a popular choice) so you can work with a ready‑made project structure.
Then, you configure the .env file with your Azure OpenAI API key and endpoint these are available in the Keys and Endpoint section of your Azure OpenAI resource in the Azure portal. Once that’s done, you ensure you have a deployed GPT model in Azure OpenAI Studio. If GPT‑4 is supported in your region, it’s an excellent choice for high‑quality, nuanced responses. Otherwise, GPT‑3.5 Turbo is a reliable and cost‑effective alternative.
After deployment, you install the OpenAI Python package
- pip install openai
- pip install dotenv
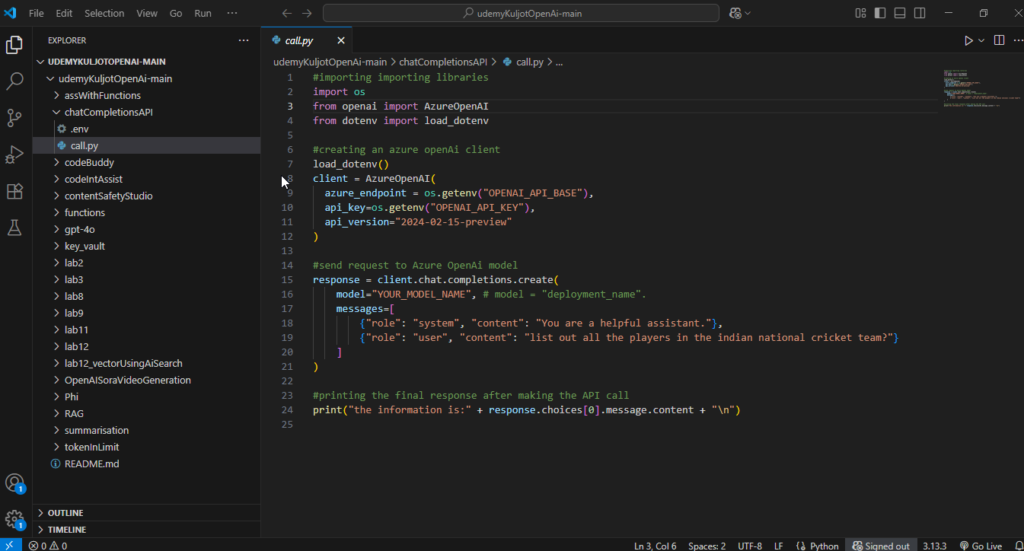
and review the provided Python script. This script shows how to create an Azure OpenAI client using your credentials and then send requests to the Chat Completions API. Here, two types of prompts play a key role:
- System prompt: This sets the rules, context, and overall personality of the model. For example, “You are a helpful assistant” will make the AI friendly and informative.
- User prompt: This is the actual question or instruction you want the AI to respond to.
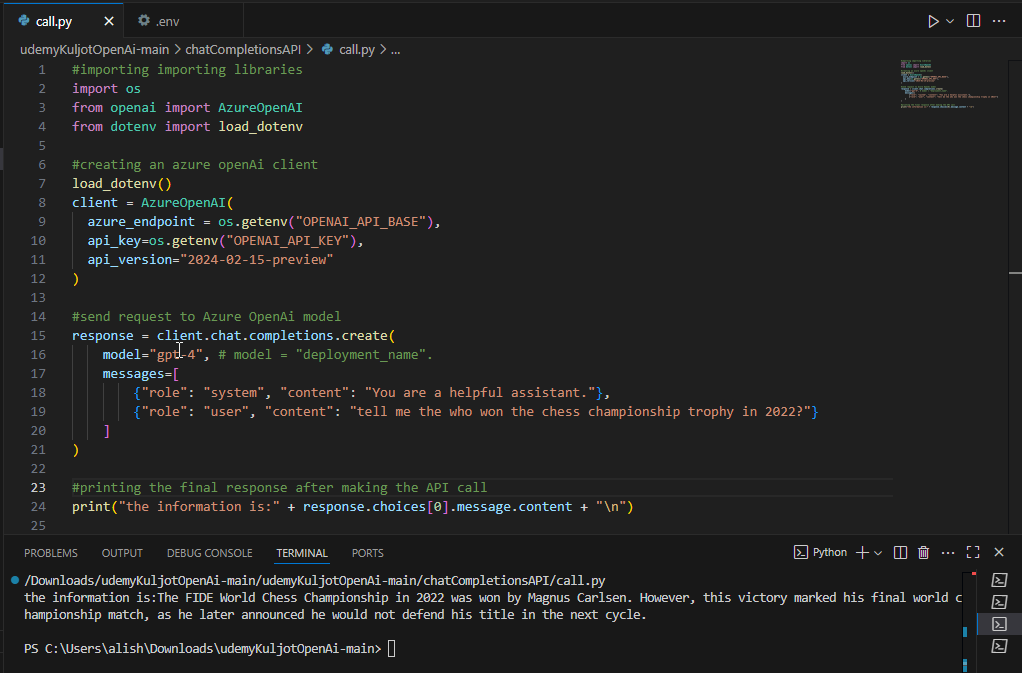
Once you run the script, the GPT engine returns a response according to your prompts and the parameters you’ve set. You can easily experiment by changing the system prompt to shift the AI’s behavior .
Understanding Vector Embeddings in Azure OpenAI
Vector embeddings are a way to represent text, images, or other data as numbers, lots of them. Instead of just storing plain words, Azure OpenAI can turn them into high‑dimensional vectors (often 1,536 numbers for the text-embedding-ada-002 model). This numerical format allows AI to compare meaning, not just exact wording.
Think of it like this:
Canine companion and dog may be stored as different words, but in embedding space, they’ll be placed close together because they mean nearly the same thing
- Capture meaning rather than exact matches.
- Group related concepts in a vector space.
- Work with unstructured data like documents, chat logs, or support tickets.
Usage:
- Hybrid search: combine keyword and meaning‑based search for better results.
- Chatbots with memory (RAG): fetch the most relevant past info before responding.
- Recommendations: suggest similar products, articles, or media.
Azure services that support vector storage:
- Azure AI Search: hybrid keyword + vector search.
- Azure Cosmos DB: store both documents and vectors for global scale.
- Azure Redis Cache with vector similarity: for fast, low‑latency lookups.
Creating and Using Embedding Engines in Azure OpenAI
In this part of the blog, we’ll explore how to create vector embeddings using Python and an Azure OpenAI embedding model. These embeddings will later be used in tasks like semantic search, recommendation systems, or Retrieval‑Augmented Generation (RAG).
To follow along, you’ll need the code repository from GitHub (provided in the course resources). Clone or fork it, then open it in VS Code or any IDE of your choice. For this exercise, we’ll focus on the Lab 2 folder, which contains:
- A
.envfile for your Azure OpenAI Key, Endpoint, and Embedding Model Name. - A
program.py
Steps to set up your embedding environment
- Deploy an embedding model in Azure AI Foundry
- Go to your Azure OpenAI resource → Deploy model.
- Search for text-embedding-ada-002.
- Select the Standard deployment type and confirm.
- This model returns embeddings with 1,536 dimensions.
- Configure environment variables
- From the Azure portal, open your OpenAI resource.
- Go to Keys and Endpoint: copy your Primary Key and Endpoint URL.
- Paste them in
.envas:
OPENAI_API_KEY=<your primary or secondary key>
OPENAI_API_BASE=<your-endpoint>
OPENAI_EMBEDDING_MODEL=text-embedding-ada-002
Run the Python code
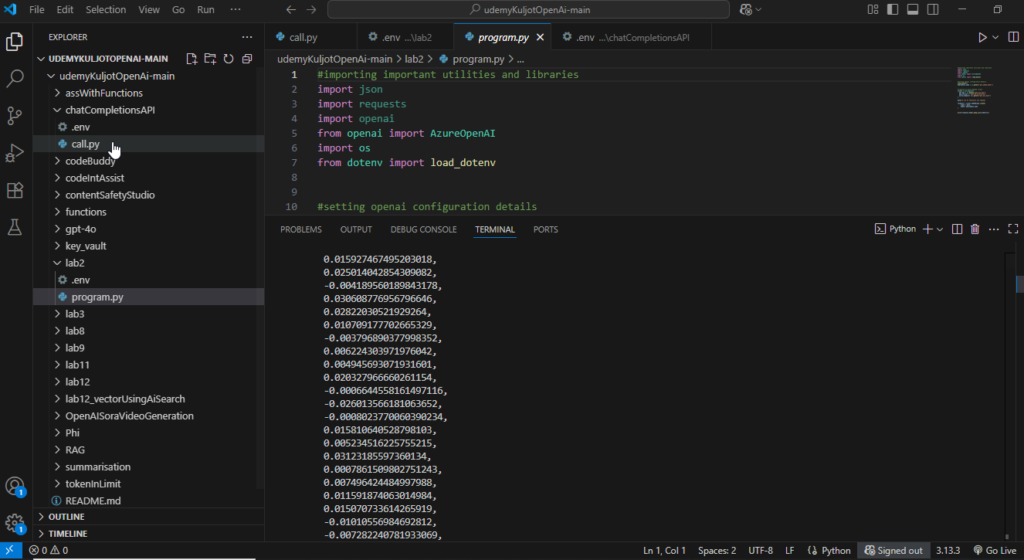
- In program.py, update the text string you want to convert to embeddings. Example: A lot of festivals are coming.
- Call the embedding API: Editclient.embeddings.create(model=embedding_model, input=text)
- Print and inspect the returned vector list. You’ll get 1,536 floating‑point numbers.
Conclusion
In this blog, we explored how Azure OpenAI can be used to deploy models, generate images, create embeddings, and connect Python code with GPT using the Chat Completions API. From setting up resources in the Azure portal to customizing prompts and controlling model behavior, each step gives you more control over your AI workflows.
The key takeaway?
- Be specific with your prompts: clarity leads to better responses.
- Experiment with parameters: like temperature to fine‑tune creativity.
- Combine features: embeddings, image generation, and chat APIs can work together for powerful, real‑world applications.
If you follow these steps and start experimenting, you’ll not only understand how these tools work but also discover new and creative ways to use them in your own projects.